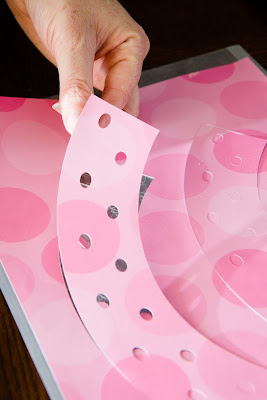
Cute cupcake wrappers can take any cupcake (even store-bought ones) to the next level. While it helps to have a digital cutter (like the Silhouette
How to Make Cupcake Wrappers Without a Digital Cutter
- Buy some really cute paper
. It should be a bit thicker than regular printer paper, although if printer paper is all you've got, that will work, too.
- If needed, trim the paper to 8.5" by 11".
- Download the PDF with the cupcake design shown above.
- Print it on the side of the craft paper that you don't want people to see.
- Cut out the wrapper shape as neatly as you can.
- Use a hole punch to punch circles into the wrapper, or cut out any other design that you like.
- Glue the ends together using Elmer's glue.
- Slip a cupcake inside and admire your work.
How to Make Cupcake Wrappers With a Silhouette Digital Cutter
- Buy some really cute paper
. It should be a bit thicker than regular printer paper, although if printer paper is all you've got, that will work too.
- If needed, trim the paper to 8.5" by 11".
 |
| Just a few examples of cupcake wrapper templates available from Silhouette. |
- Purchase a wrapper template (Silhouette has lots of wrapper templates to choose from, as shown above), download my Silhouette template, or design your own template within Silhouette.
 |
| Always put your cupcake wrapper paper on the sticky mat before cutting. I learned that an easy way to keep the mat clean and sticky is to use a lint roller between uses. |
- Prepare your Silhouette file for printing, following the instructions that come with the machine.
- Affix your paper to the sticky mat that comes with the Silhouette, and cut! (Note:
It takes longer to cut more complicated designs. If you had a computer in the 80's and used Print Shop on a dot matrix printer, you know what I am talking about.)
- Peel the cupcake wrapper off of the sticky mat.
- Glue the ends of the wrapper together using Elmer's glue.
- Slip a cupcake inside the wrapper, and admire your work.


I noticed that the wrappers don't curve around the edge of the bottom. When someone goes to pick a cupcake up by the wrapper, doesn't the cupcakes then drop quite a ways downward in the wrapper? (If that makes sense)
ReplyDeleteI think I understand your question, It works because it's a really tight fit. So tight, in fact, that it's best to slip the wrapper on before frosting - otherwise, the frosting could get messed up while trying to slide the wrapper on.
ReplyDeleteAh. That makes sense then. Thanks!
ReplyDeleteGreeting cards, place cards, stencils for wall borders, menus, name cards for parties, dish labels for buffet tables, and of course, cupcake holders.
ReplyDeleteGreat tutorial on the process of making cupcake wrappers!! I love the paper you chose too!
ReplyDeleteWell done!
I am not able to download the regular template. When I click on the link it shows me a blank page. Do you know what the issue could be?
ReplyDeleteBecky - It looks like the site I'm hosting the files on is down right now. If it's still down tomorrow, I'll try moving them somewhere else. Sorry!
ReplyDeletegreat idea,stef...thanks for sharing.i work with paper alot...this has upped my portfolio of the crafts i can do with paper...loving it real good...thanks again
ReplyDeleteThis post is a GODSEND!!!
ReplyDeleteIf you would like to customize or personalize your wrapper you could go to this website and then cut them yourself. They are really cute!
ReplyDeletehttp://www.makecupcakewrappers.com/
this is such a great post!
ReplyDeleteSuper cute idea! I love making cupcakes and when I decorate mine I use these cupcake wrappers http://www.bellacupcakecouture.com/category_1/Cupcake-Wrappers.htm.
ReplyDeleteThis is a good tip for a back up idea though.
Thanks Carrie